Managing solution components
You can manage the solution components by clicking on the “Components” tab of the Solution Builder (see below)
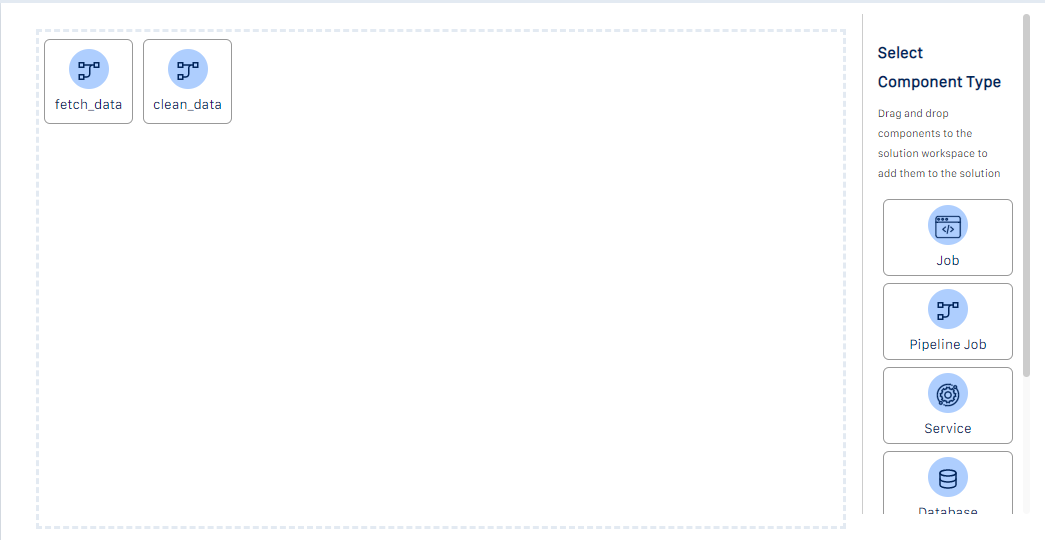
This will display any existing components at the top of the Solution Builder workspace.
Adding components
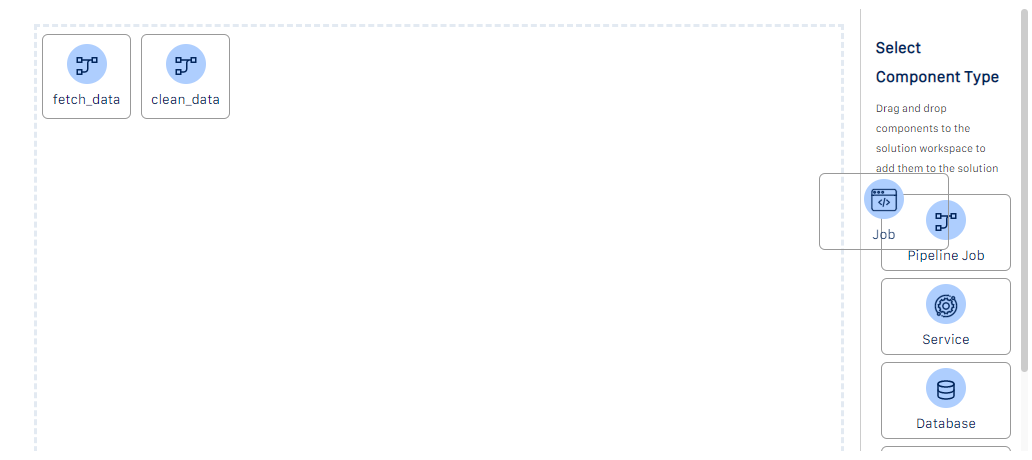
You can add a component by clicking on one of the available component types on the right-hand panel and dragging it into the Solution Builder workspace (see below for an example of adding a job to the solution)
When you add a component, a dialog box opens where you can specify the properties of the new component (see below)
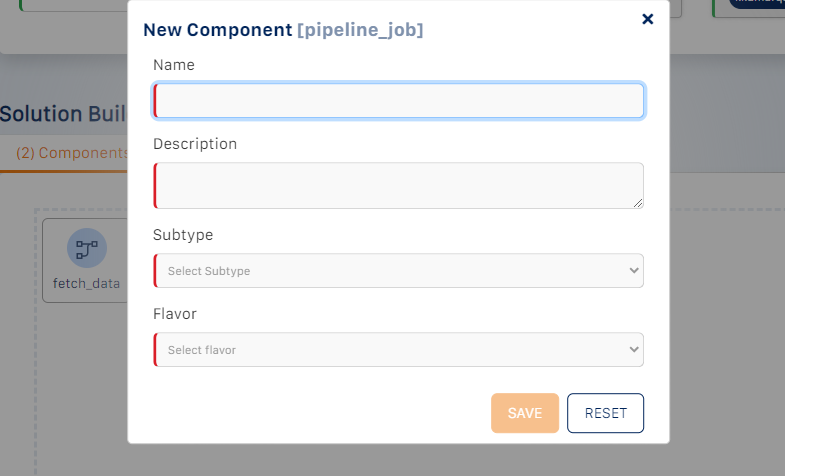
You can specify the following component properties:
Name
The component name must satisfy the following constraints: - Must be unique within the solution
Must comprise of only:
lowercase alphanumeric([a-z],[0-9]) characters and
underscore(_)
Must start with a letter
Description - provide a brief description of the component
SubType - select “Custom” if you want to create the component from scratch. Else, select on the of the library components listed
Flavor - select the programming language you want to use to create the component
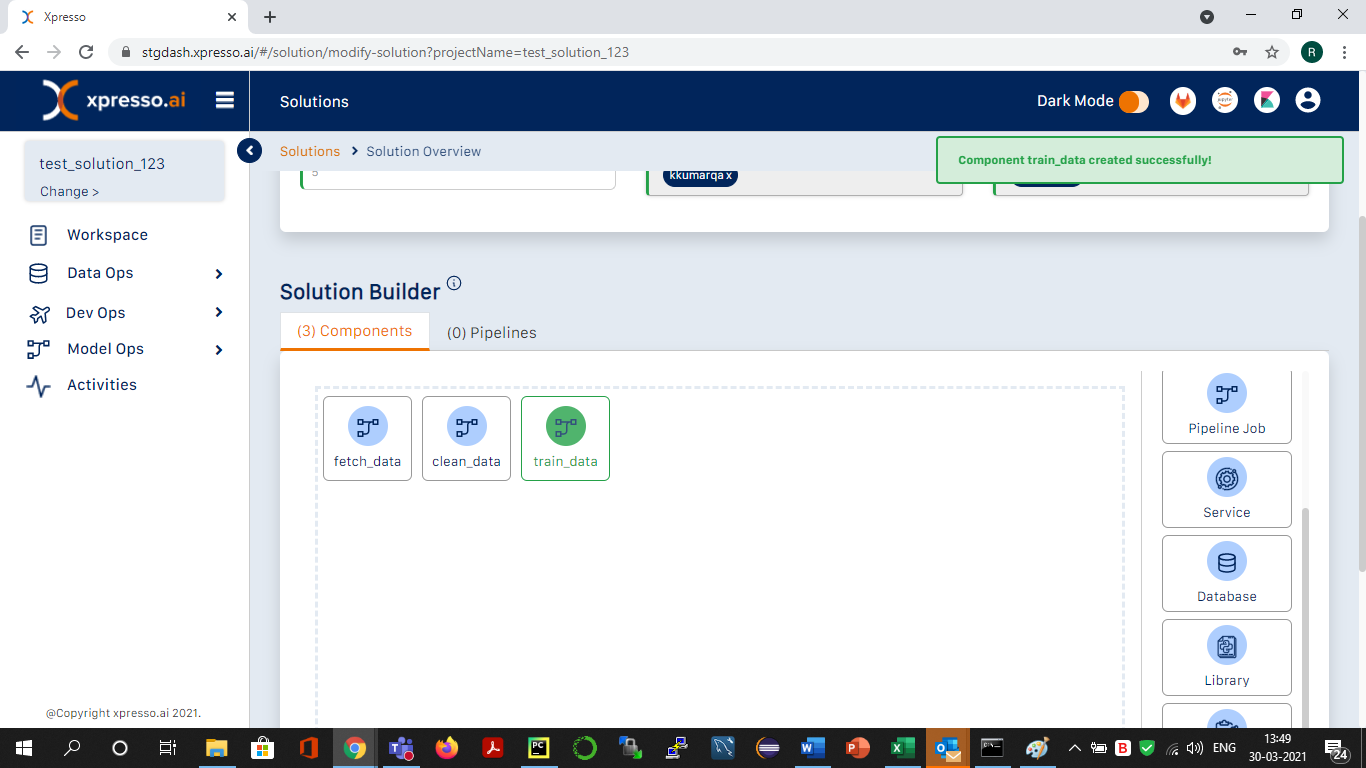
Click the “Save” button to submit the changes to the solution. You should see the new component added to the Solution Builder workspace (see below)
Repeat this process to add more components to the solution. Click “Submit” to save the changes to the solution
Modifying and deleting components
To modify a component, click the component in the Solution Builder workspace. A dialog displaying the component details will be displayed (see below)
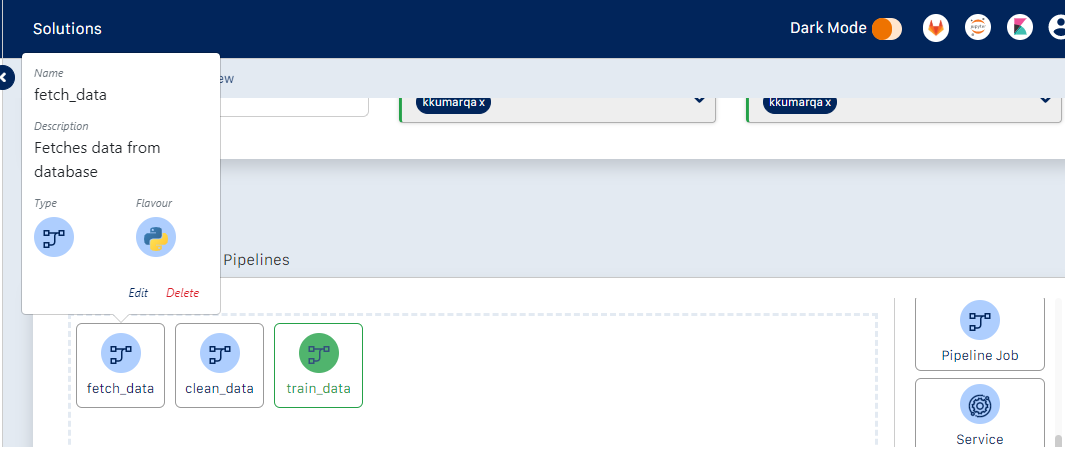
Click the “Edit” link to change the component description (the component name cannot be modified)
Click the “Delete” link to delete the component. Click “Submit” to save the changes to the solution.
What do you want to do next?